Splinters are one of those pesky everyday injuries that can catch anyone off guard, whether you've been pottering about in the garden, tackling a DIY project, or simply walking barefoot across wooden flooring. These tiny fragments of wood, metal, or glass can embed themselves into the skin of your hand or foot, causing discomfort and irritation. Fortunately, most splinters can be removed safely at home using common household items and a bit of patience. Knowing the proper techniques for splinter removal not only helps you address the problem quickly but also reduces the risk of infection and ensures proper healing. With the right approach and attention to cleanliness, you can handle this minor mishap without needing to rush off to the GP.
Preparing the Affected Area and Gathering Your Kit
Before attempting any form of splinter removal, it is essential to prepare both the affected area and the tools you will use. Proper preparation significantly reduces the risk of introducing bacteria into the wound, which could lead to infection. The first step involves washing your hands thoroughly with soap and warm water to ensure you do not transfer any dirt or germs to the injury site. Once your hands are clean, gently wash the area around the splinter using the same method. This simple act of cleaning helps to remove surface debris and creates a cleaner environment for the extraction process.
Proper cleaning and sterilisation techniques
After washing the area, it is important to dry it gently with a clean towel or let it air dry. Avoid rubbing the skin harshly, as this could push the splinter deeper or cause additional irritation. Sterilisation is a critical component of safe splinter removal. Any tools you plan to use, such as tweezers or a needle, should be sterilised to minimise the risk of infection. You can do this by wiping them with rubbing alcohol or holding them briefly over a flame and then allowing them to cool. This step is crucial because even a small puncture in the skin can serve as an entry point for bacteria. By taking the time to sterilise your instruments, you are following best practices recommended by medical professionals and organisations focused on skin care and dermatology.
Essential household tools for splinter removal
Most households already have the necessary tools for effective splinter removal. A pair of fine-tipped tweezers is the most commonly used instrument, ideal for grasping the visible end of a splinter and pulling it out smoothly. If the splinter is embedded beneath the skin and not easily accessible, a sterilised needle can be used to gently tease the skin open and expose the fragment. A magnifying glass can also be helpful, especially if the splinter is small or difficult to see clearly. Additionally, having some antiseptic solution, petroleum jelly, and a clean plaster or bandage on hand will ensure you can properly clean and dress the wound after the splinter has been removed. These simple items form a basic health resource kit that can be invaluable for minor injuries.
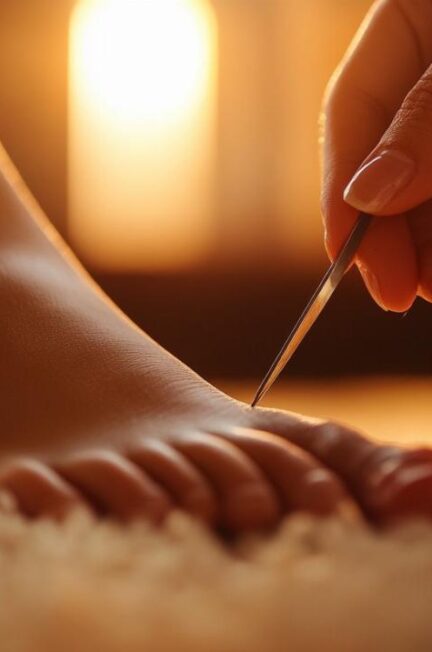
Step-by-step splinter extraction methods
Once the area is clean and your tools are ready, you can proceed with the actual extraction. The method you choose will depend on the depth and position of the splinter. It is important to work slowly and carefully to avoid breaking the splinter, which can make removal more difficult and increase the risk of leaving fragments behind. Patience and a steady hand are key to successful splinter removal using household items.
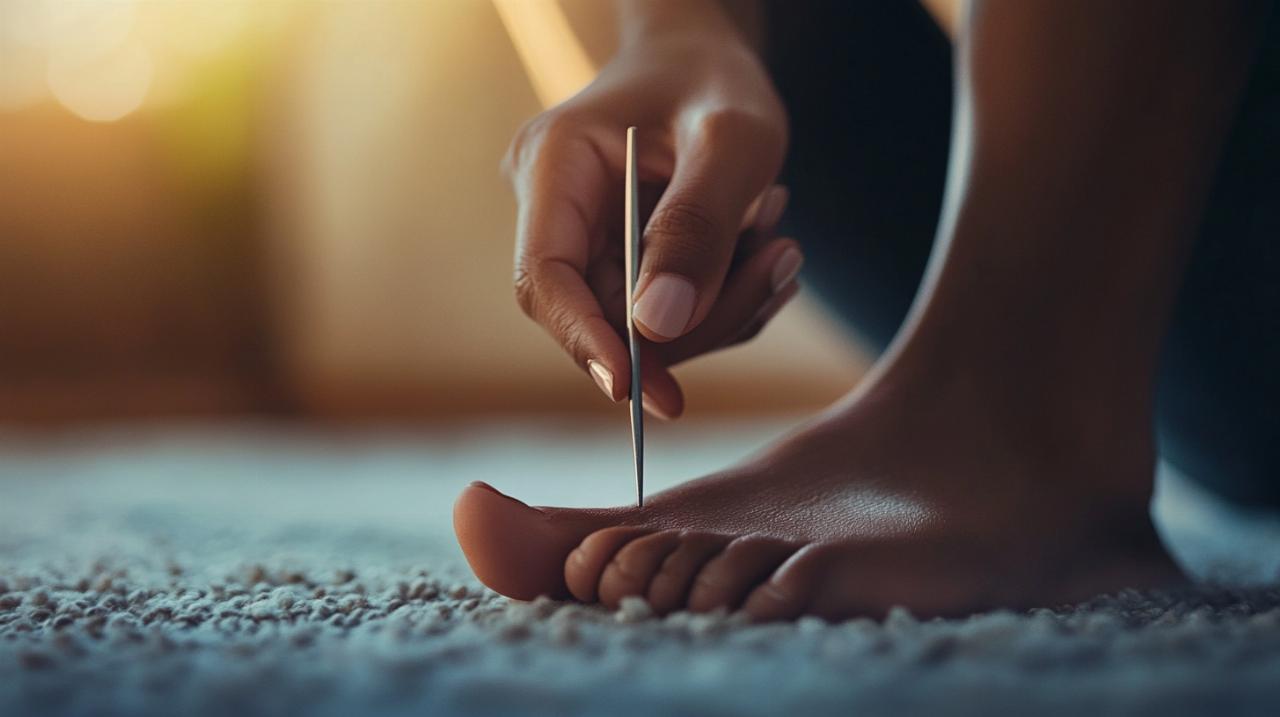
Using tweezers for surface-level splinters
For splinters that are partially protruding from the skin, tweezers are your best option. Hold the tweezers close to the skin and grasp the visible end of the splinter as firmly as possible without crushing it. Pull gently but steadily in the same direction that the splinter entered the skin. Avoid yanking or twisting, as this can cause the splinter to break. If the splinter is at an angle, try to follow that angle as you pull. This technique works well for most surface-level splinters and is straightforward enough for anyone to manage at home. After removal, inspect the area to ensure the entire splinter has come out and no fragments remain embedded in the skin.
Needle technique for deeply embedded splinters
When a splinter is buried beneath the surface of the skin and cannot be grasped with tweezers, a sterilised needle may be necessary. Gently use the tip of the needle to break the skin over the splinter, working carefully to expose enough of the fragment so that it can be gripped with tweezers. This should be done with minimal pressure to avoid causing unnecessary pain or damage to the surrounding tissue. Once the splinter is exposed, switch to tweezers to pull it out. Some people also use alternative household remedies to help draw out splinters, such as applying a paste made from baking soda and water to the affected area and covering it with a bandage overnight. The idea is that the baking soda increases osmotic pressure, which may help bring the splinter closer to the surface, making it easier to remove the following day. While such treatment methods are popular, they should be used with caution and are not a substitute for proper medical advice if complications arise.
Aftercare and When to Seek Medical Attention
After successfully removing the splinter, proper aftercare is essential to promote healing and prevent infection. The wound should be cleaned once more with soap and water, then dried gently. Applying a small amount of antiseptic ointment or petroleum jelly can help keep the area moist and protected. Covering the wound with a clean plaster or bandage will shield it from dirt and bacteria as it heals. It is important to monitor the site over the following days for any signs of infection or other complications.
Proper wound dressing and monitoring
Keeping the wound clean and dry is vital during the healing process. Change the plaster or bandage daily or whenever it becomes wet or dirty. If the wound appears to be healing well, you may be able to leave it uncovered after a day or two to allow air to reach the skin, which can aid recovery. However, if the area remains tender or if you notice any unusual symptoms, it is best to continue covering it and to keep a close watch. Simple skin care practices, such as avoiding picking at the wound and keeping your hands clean, will support the body's natural healing mechanisms and reduce the likelihood of infection prevention issues.
Recognising signs of infection requiring gp consultation
While most splinter injuries heal without incident, there are times when professional medical attention is necessary. If the splinter was particularly large, deeply embedded, or located near a sensitive area such as the eye, it is wise to consult a dermatologist or your GP rather than attempting removal at home. Signs of infection include increased redness, swelling, warmth around the wound, pus or discharge, and persistent pain. If you experience any of these symptoms, or if you are unable to remove the splinter completely, seeking advice from medical professionals is the safest course of action. Organisations such as the American Academy of Dermatology and trusted health information sources like Healthline emphasise the importance of recognising when a minor injury requires expert intervention. Chronic conditions or compromised immune systems can also make individuals more susceptible to complications, so patient support and proper health resources are invaluable. In cases where home treatment is not successful or where there is any doubt about the severity of the injury, do not hesitate to reach out to a qualified dermatologist or healthcare provider for guidance. Taking these precautions ensures that what begins as a minor inconvenience does not develop into a more serious health concern, allowing you to maintain overall wellness and peace of mind.